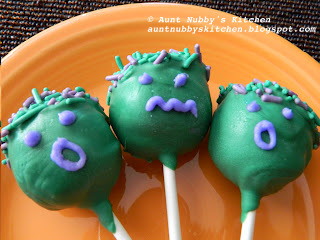
I have looked at Bakerella’s cake pops with awe for quite some time now, and finally decided it was time to see if I could put some of those little treats together. The way she makes them is truly a work of art. Mine are more of a fun Halloween project. The general recipe and directions that I used came from the Pioneer Woman Cooks.
1 can (16 ounces) cake frosting (any flavor you like)
2 bags (14 ounces each) melting chocolate (any color or combination of colors)
1 bag lollipop sticks
various tubes frosting or gel icing or sprinkles, if desired
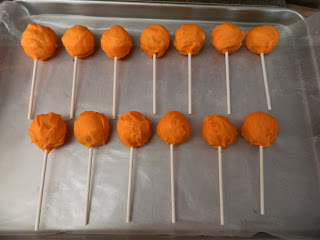
Bake cake according to package directions, using a 9 x 13-inch pan. Allow to cool completely. After the cake is cooled, crumble the cake into a large bowl until the cake is in very fine crumbs. Use about 3/4 of the can of frosting, and using two forks, work the frosting into the cake crumbs until the frosting is no longer visible. Next, roll the mixture into small balls about the size of a walnut. A small cookie dough scoop can help get them the same size. Put the balls on a wax paper lined sheet pan and put them in the freezer for at least an hour.
After the cake balls are firm, melt the chocolate pieces in a double boiler. Working with only a few cake balls at a time, insert a lollipop stick into the cake ball and either dip it in the chocolate or spoon the chocolate over it until it is well coated. Lay the coated cake pops down on wax paper to harden. If using sprinkles, add those immediately after dipping. After the chocolate has hardened the cake pops can be decorated with gel or frosting as desired.
After the cake has cooled, finely crumble it in a large bowl.
Stir the frosting into the crumbled cake using two forks, working it in until the frosting is no longer visible.

Decorate any way you like.
Add a cellophane bag and a ribbon for a party treat. For more ideas see Halloween Cake Pops II.


When my sister makes Cake Pops she uses no frosting or as little as possible and they turn out great. Also get some blocks of cheap styrofoam to stick your pops in to dry them, that way they stay nice and round and dry evenly. It's a good way to show them off too, if you are displaying them.
They turned out cute! I'm sure you had fun making them:@)
How fun…and cute! The kids will love them!