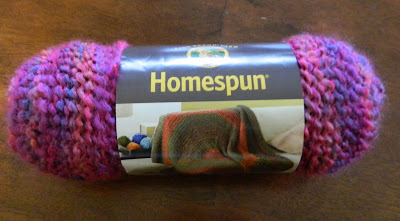
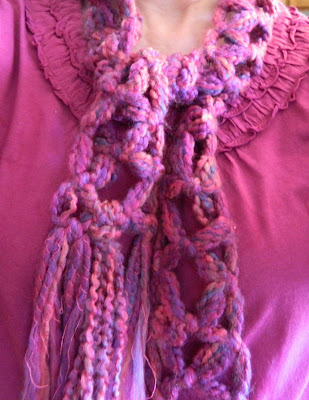
The directions for the project said to use bulky weight yarn. This is the yarn I chose, mostly because I liked the color. I think it is not as bulky as the project intended, but I don’t have much experience with yarns.
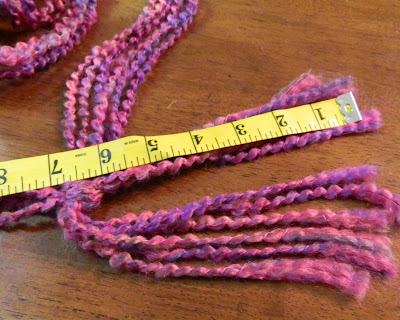
The pattern instructed to cut 12 pieces of yarn, each 140-inches long. These are to be divided into 4 bunches of 3 strands each.
After some trial and error, I ended up cutting 24 pieces of yarn, then dividing them into 4 bunches of 6 strands each. I read some of the comments on the site, and apparently if the yarn is thinner, you will need more strands in each bunch.
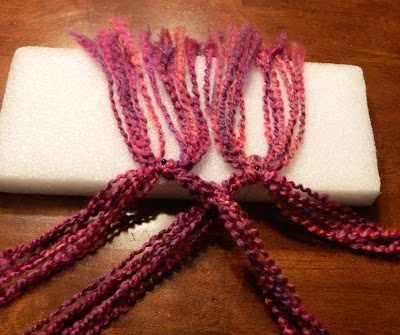
The first step is to tie two of the bunches together with a square knot, leaving 6 inches of fringe at the end. Repeat with the remaining bunches.
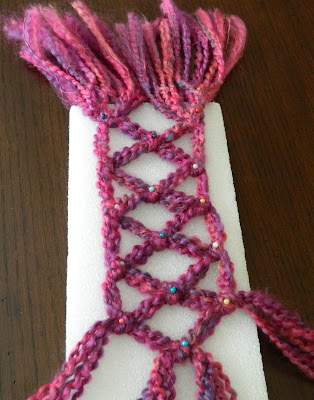
Then you need to pin the two knots to a foam board. Knot the inner two bunches together, spacing the knot about 1 inch from the existing knots, then knot the left and right bunches together. Alternate knotting the inner bunches and the left and right ones, spacing knots evenly apart, until about 6 inches of yarn remains on the end. Finish so that the final knots mirror opposite end, and trim to even the fringe ends.
On my first attempt I pinned the first two knots to the foam board and started tying the knots. This didn’t work well for me because I couldn’t hold the yarn taut enough. I untied what I had done, and restarted, this time, pinning each knot down to the board as I tied. This helped me keep the yarn tight.
Another issue I ran into was dealing with the long pieces of yarn I was working with. My solution for this was to roll them up and clip them with hair clips to keep them a manageable length as I tied.
Despite a false start, this was really an easy project, and I love the scarf. One note – the directions called for cutting the yarn 140 inches long to make a scarf 86 inches long. The finished length of my scarf was only 56 inches. I can’t account for the difference, but if you want a really long scarf, I would recommend that you cut the yarn longer. I like the length of the scarf I made, but it did not come out as long as the pattern indicated it would be.
One additional thing I did was to add an extra bunch of fringe in the center on each end. I cut 6 more strands of yarn and looped them through so there would be three bunches of fringe on each end.






It's lovely! What a neat project.
It's beautiful Anita! I love the color. I can't knit either, but like to crochet from time to time – I can't do anything fancy though. Thanks for the inspiration!
How clever are you Anita. This is gorgeous. Not really scarf weather where I am but maybe for those windy winter days we get here from time to time in August.
Anne xx
Gorgeous, Anita! I love the color & what a fun project.
Hi! I just found your blog and I loved it! I am a happy follower now!
Visit me at: my-greek-cooking.blogspot.com
I have no idea how to knit or crochet either (but it's one of my New Year's resolutions!) I'm going to give this a try. Just had an idea: add beads to it!
Nice! I'm looking forward to trying this.
This is wonderful, I can't crochet or knit either but I always see yarn that I think would make a beautiful scarf.
I'm hosting a winter theme linky party and would love it if you'd link up!
http://www.serendipityandspice.blogspot.com
-Melissa
This is pretty, I crochet but I haven't made anything as pretty as yours.
Looks like you've been crafty lately.
Regarding the yarn, you are brave to work with Homespun for a first project. I crochet and use it because I love the look, but all those bumps and ridges are hard to work with.
This is a bulky yarn, so if you need a thicker yarn, try a super bulky. (Look on the back for a yarn ball symbol with a number 6 for super bulky.) As you said, holding yarn together will make the same weight of yarn. I just thought if you make this again it might make it easier with the long lengths to not have to hold so many pieces at a time.
I wouldn't have thought about the hair clips. That was a great tip! And you now have a very lovely scarf too!
Thanks for linking this to my party!
Thanks a lot for this nice tutorial! I did it with more distance and other yarns and I like the result too 😉 Have a wonderful day!
Thanks for sharing your creativity with us at Sharing Saturday 🙂
~MiaB
http://www.mamamiasheart2heart.com
Anita, You have wowed me again! This is a wonderful winter project that really turned out beautifully! Thanks so much for sharing it! I am posting it to FB tonight too! Love your posts!
So cute and cosy!
Thank you so much for taking the time to join our Pin'Inspiration party this week. I'm hoping that you'll pop by tomorrow and share at my "Beat The Winter Blues" party. 🙂
Thanks so much for linking up to my Manic Monday link party…it was a huge success! Make sure you check back tomorrow when I feature the top 3 posts. I’ll be hosting another Manic Monday linky party this week- the theme is LOVE. :)www.serendipityandspice.blogspot.com